- Continuing with the previous post dealing with studio photography, I will continue to discuss the main concepts of lighting, posing, editing opportunity, and experimentation. This time, of course, evaluating these methods when used in the context of lifestyle portraits.
1. Lifestyle/Outdoor Lighting
- First and foremost, mastering outdoor photography is a dealer’s choice. You can be as sophisticated or as modest as your gear will allow. If given the choice, I encourage you to experiment and get used to working with flash, diffusers, and reflectors. These will help you take advantage of the sunlight you do have, without having to rely solely on it. Take a look at the video below to become a master of these materials and begin to understand where and how you can make outdoor portraits happen.
2. Lifestyle/Outdoor Posing
- Posing in an essential part of outdoor photography because you are not limited to the 4 walls of a studio! Feel free to get creative and once again lean on mood-boards and posing references to dominate any given area.
- Texture, texture, and more texture. You have so many options to appeal to so many emotions when working with the elements. A rainy day, a busy street, a candy store, neon signs, pools, flowers, brick walls, you name it and it can easily be Incorporated into your portraits.
- With all these options it can be easy to get off track and lose cohesiveness within a particular portrait set. Its important to maintain a central understanding while using all these components!
3. Editing Opportunities
- Without overstating what was said about editing in studio portraits, a lot of the same can be said for lifestyles. An important note to keep in mind outside, however, is the expanded opportunities for editing. For instance, being able to understand what can be taken away from an image, added to an image, or changed in an image outside is important for making the most out of the environment. Lets say you really wish you had a yellow wall to throw behind your model, but instead you pass a dingy blue wall with a few signs on it instead. Remember, these signs can potentially be edited away, and the color of the wall changed and resurfaced to blue if you wanted to do so! Of course, some of this thinking might come as your editing abilities grow, but the possibilities remain endless.
4. Experimentation
- Just like with all things photography, creativity is the name of the game. Think of ways you can use your model with your environment in a fun and new way. Or practice creative photos you find online, these will always help you begin to shape your own eye for creativity, and help foster your own understanding of a portrait-capable environment.
- Never ever leave props off the table, especially when outdoors. Remember, you are often in a larger space with plenty of resources. Buy an arrangement of flowers or pick some for your model, have them drink a popular soda or use an umbrella. These and countless other methods are small ways to turn a small shoot into a huge moment.
- Below are some of my own photos in which I feel I demonstrated an understanding of my environment.
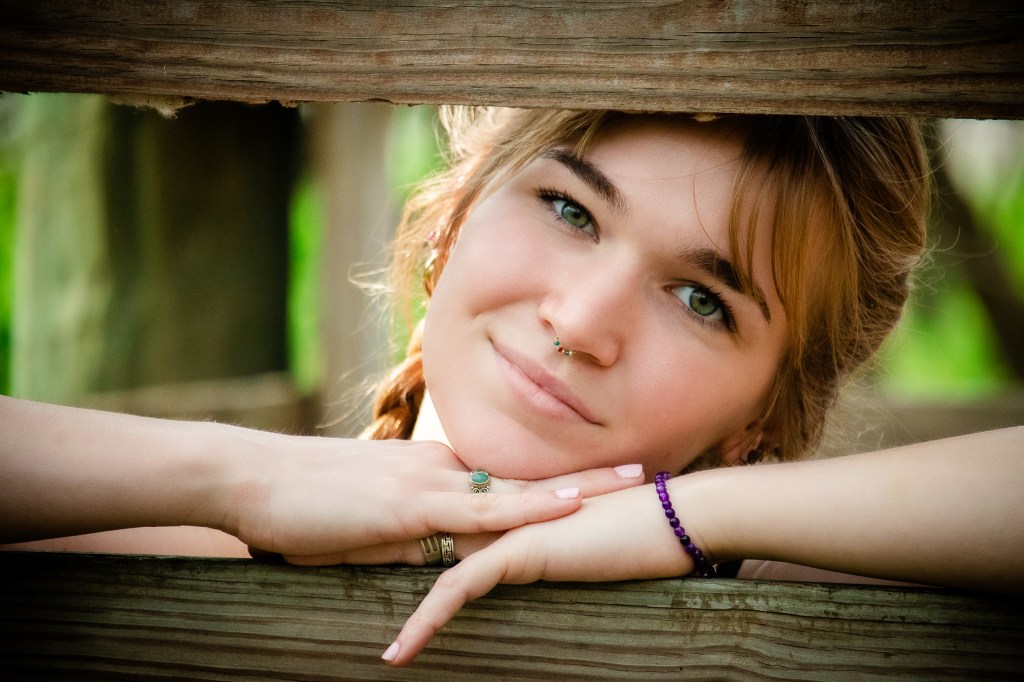

- In the first photo, you can see I placed my model on a dock between two boards to create a natural boarder within the boards. Not only does this offer great composition, but the texture of the planks plays a role in the image as well. In the second photo, we picked up a bottle of coke to compliment the simplicity of the outfit. Her original shirt was pink, and has been edited to white to work better with the chosen prop.
