In the next two posts I will discuss the various techniques used during studio-portrait and lifestyle-portrait photography. These styles will be broken down into categories of lighting, scenery/posing, editing opportunities, and experimentation! These four categories can be taken advantage of in several different ways to create the cohesive attitude you are trying to achieve.
1. Studio Lighting
- This is the complete and utter essence of studio photography. You can use as much or as little light to create an array of different lighting patterns. If you are not familiar with general lighting patterns, watch the video below for a quick refresher! This video fully explains the five main key light patterns used in portrait studio photography. Begin to familiarize yourself with key/or main lights and secondary lighting sources!
- Studio photography is going to take plenty of experimentation and effort. Studying various lighting setups and techniques will be paramount in saving both your time and reputation in the studio. A quick and easy transition from one setup to another will ensure a smooth studio-shoot on the photographers end.
2. Studio Posing
- The most important thing to remember about posing is that it is directly influenced by lighting! SO, if you are not familiar with where your lights are set and what part of the face is going to be illuminated or not is essential before mastering the art of posing your model. I urge you to watch the video below and listen to what the photographer does to capture each look and how she works with a newer model to create great looks using her natural look and features.
- In my early experience, I have worked with a lot of novice models as well, so it is essential to work with your model to understand what poses they will be willing to work at and try and achieve. Mood boards and pose references are encouraged! I myself try to work with the model as much as possible to shoot naturally and loosen up before moving toward my core goal of the shoot. If I ever enter a space where we run out of potential poses the model feels comfortable or capable of, it can be a life-saver to look through some references you might want to try. Boosting confidence throughout the shoot is part of your job, if the model feels comfortable, the poses will follow.
3. Editing Opportunities
- As much as you are a photographer, you are an editor. A key focus for me during my shoot is understanding how my editing will work to achieve the look I am going for, and how I can accompany my lighting and models to work towards that goal in a way that is cohesive with editing. This is important when understanding where you are focusing, whether using Ai, Servio, Manual, and where and how your lighting may effect global and local dodging and burning, etc…
4. Experimentation
- Shooting in studio will take time and creativity. The more heavily you experiment, the more you will like your results. Once lighting is something you are comfortable with, you can move your experimentation towards your model and environment. Get weird with your poses, go wild with hair and makeup, put glitter and spray paint on your backdrops and introduce props! Below are some photos I have taken in studio where I feel a leap on experimentation had taken place and was quite successful!
- My studio images-
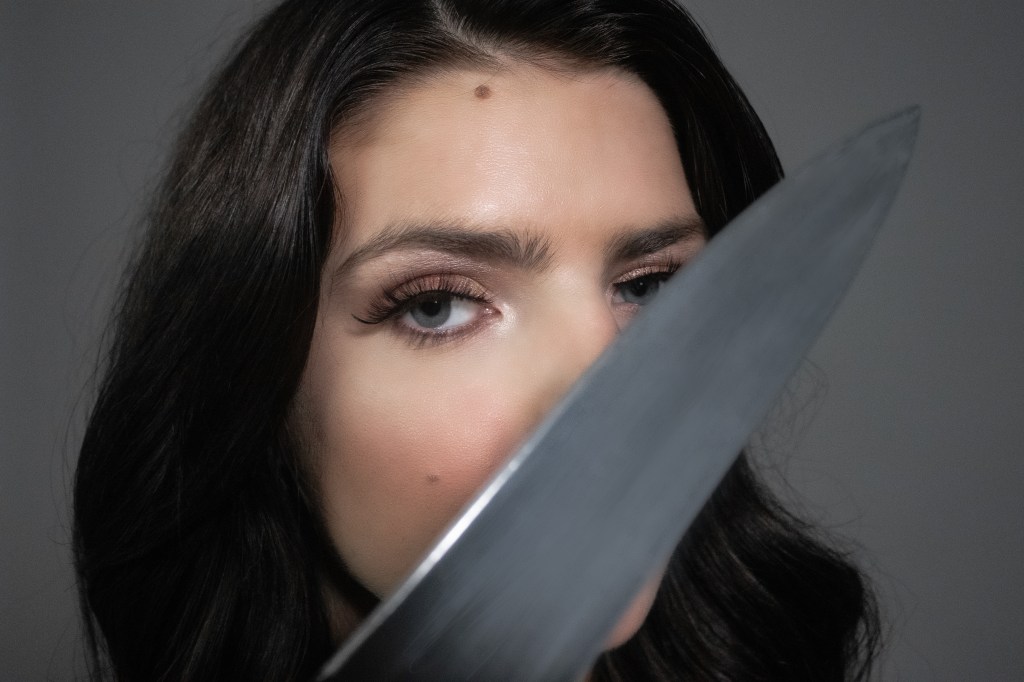
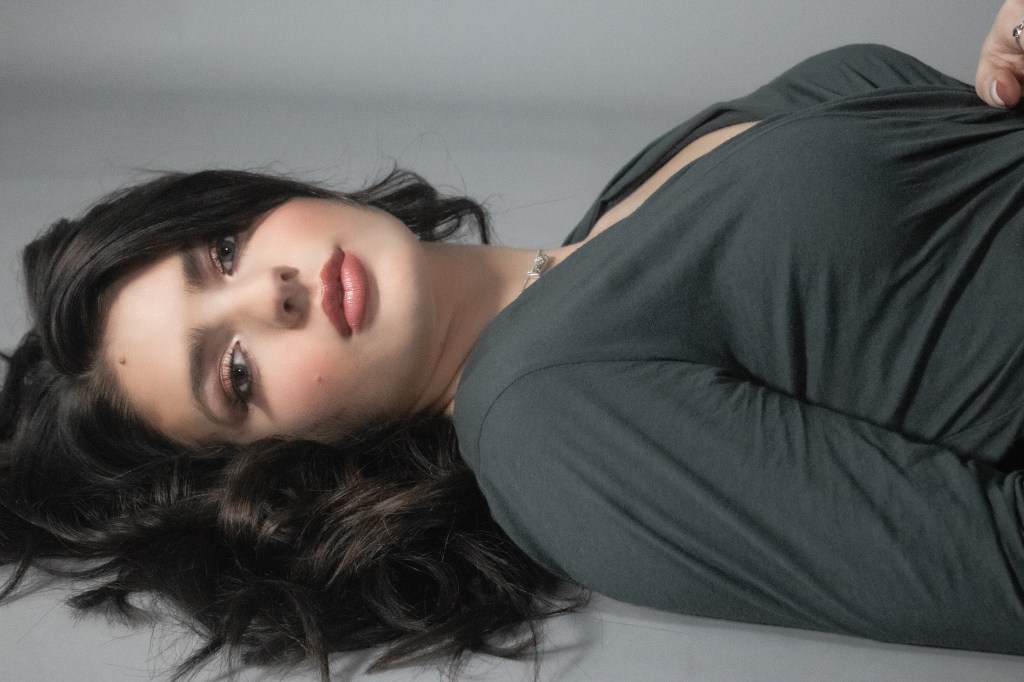
- In the first photo, I introduced a prop knife during the end of our shoot, allowing to shoot some very fierce portraits and wrap the shoot up with some laughs. In the second photo, I took advantage of this model’s very flowing dark hair and had her lay on the ground, then concentrated her eyes and had her slightly close them to deliver a serious and beautiful result.
